Text Boxes
Learn how to insert built-in text boxes, draw custom text boxes, resize, move, format, apply styles, and change shapes in Microsoft Word.
Video
Watch the lesson video, then complete the reading and challenge.
Lesson Notes
Read through the key concepts before you try the challenge.
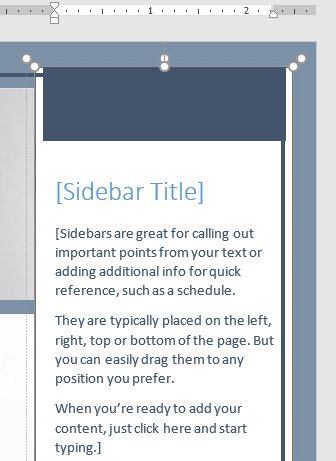
Inserting a Built-In Text Box
Go to the Insert tab and click Text Box. Choose from the built-in text box gallery to quickly add styled text areas to your document.

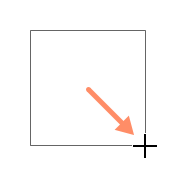
Drawing a Custom Text Box
Select Draw Text Box from the Text Box dropdown. Click and drag anywhere in the document to create a custom-sized text box.
Typing and Formatting Text
Click inside the text box and begin typing. Use the Home tab to change font style, size, color, and alignment.

Moving and Resizing Text Boxes
Click the border of the text box to select it. Drag from the border to move it. Use the corner sizing handles to resize proportionally.


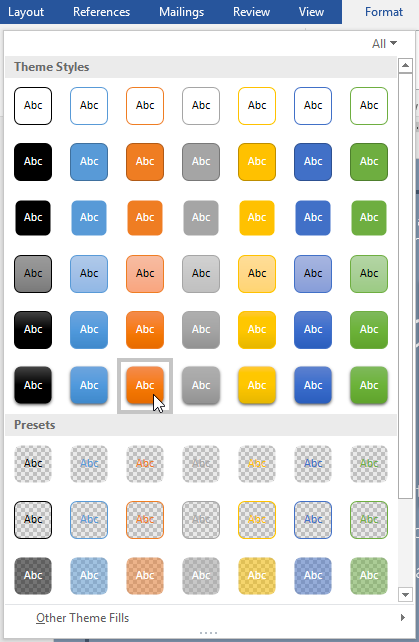
Applying Shape Styles
When a text box is selected, the Format tab appears. Use Shape Styles to quickly apply preset fill, outline, and effect combinations.


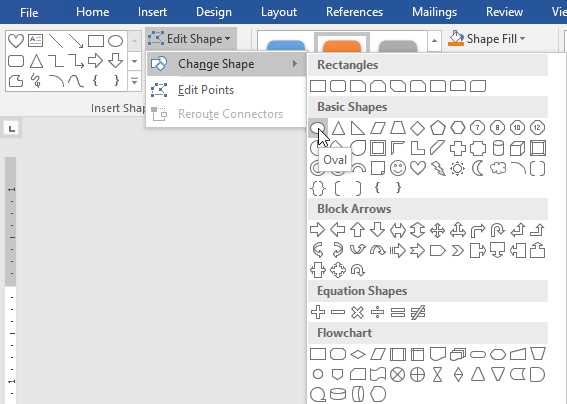
Changing the Text Box Shape
You can convert a text box into another shape. Go to Format → Edit Shape → Change Shape and select a new shape.

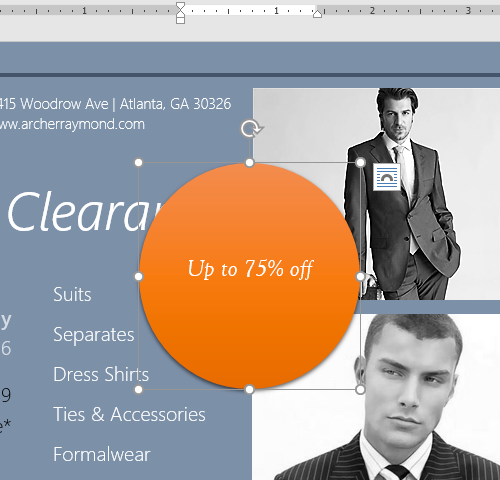
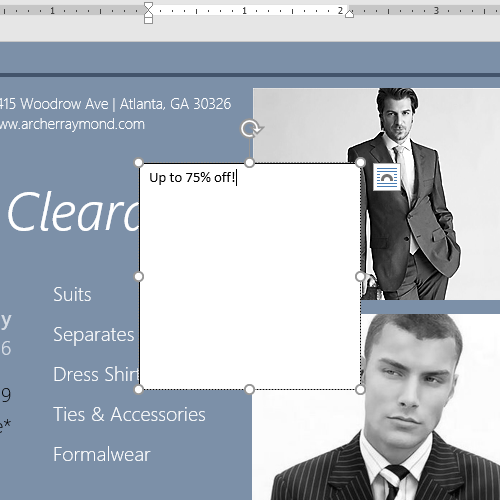
Final Example
After inserting, styling, resizing, and changing shapes, your final promotional layout might look like this:

Knowledge Check
What is the purpose of a text box in Word?
Practice File
Download this file and follow along with the lesson.
Challenge
Apply what you've learned in this lesson.
Using the practice file, complete the following tasks:
- Insert a built-in text box.
- Resize and position it over the image.
- Change the fill color to orange.
- Change the text to: Up to 75% off!
- Apply a Shape Style from the gallery.
- Change the text box shape to an Oval.