Sorting Data
Learn how to sort text, numbers, and custom lists in Excel. Master basic sorting, multi-level sorting, and logical ordering using the Sort dialog box.
Video
Watch the lesson video, then complete the reading and challenge.
Lesson Notes
Read through the key concepts before you try the challenge.
Understanding Sorting in Excel
Sorting reorganizes your dataset based on the values in one or more columns. Instead of manually rearranging rows, Excel automatically moves entire records together so your data remains aligned.
You can sort alphabetically, numerically, by date, or by a custom logical order such as T-shirt sizes.
Step 1: Select a Cell Inside Your Dataset
Before sorting, click anywhere inside your dataset. Excel will automatically detect the surrounding data range.
If you select only one column instead of the entire dataset, you risk misaligning rows and corrupting your data.
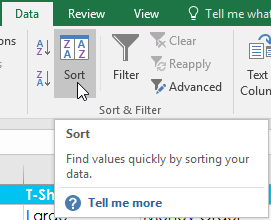
Step 2: Locate the Sort Commands
Sorting tools are located on the Data tab inside the Sort & Filter group.

There are two quick-sort buttons (A–Z and Z–A) and a full Sort button for advanced options.
Basic Sorting: A to Z
The A–Z button sorts text alphabetically (A to Z), numbers from smallest to largest, and dates from oldest to newest.
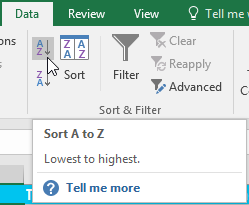
After clicking A–Z, Excel reorganizes the entire dataset based on the selected column.
Basic Sorting: Z to A
The Z–A button reverses the order. It sorts text from Z to A, numbers from largest to smallest, and dates from newest to oldest.
This is useful when identifying top performers, highest values, or most recent entries.
Using the Sort Dialog for More Control
For advanced sorting, click the Sort button instead of the A–Z icons.
The Sort dialog box allows you to choose specific columns and define custom sorting rules.
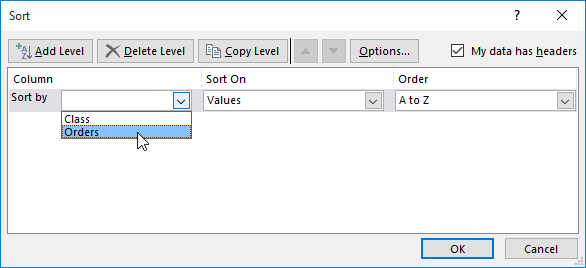
If your dataset includes headers, ensure 'My data has headers' is checked so Excel recognizes column names.
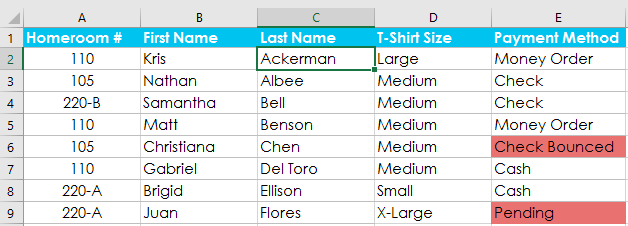
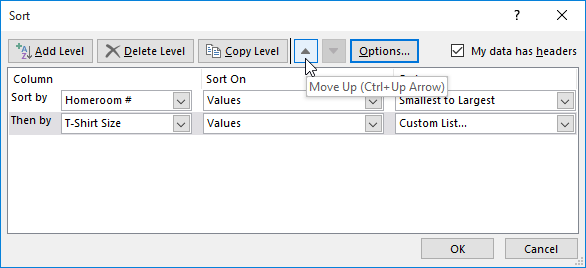
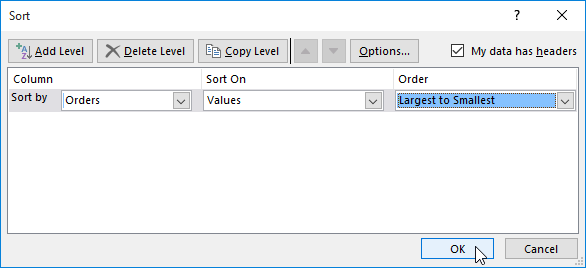
Multi-Level Sorting
Multi-level sorting allows you to sort by more than one column. Excel sorts by the first column, then breaks ties using the second column.
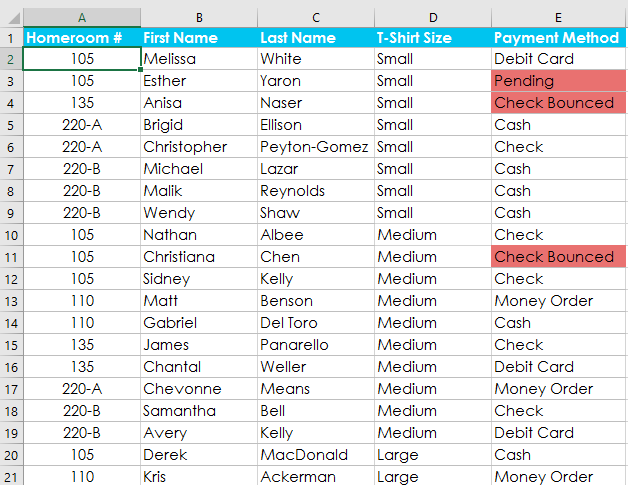
For example, you could sort by Homeroom number first, then by Last Name.
Use Add Level to introduce another sorting rule. You can adjust priority using Move Up or Move Down.
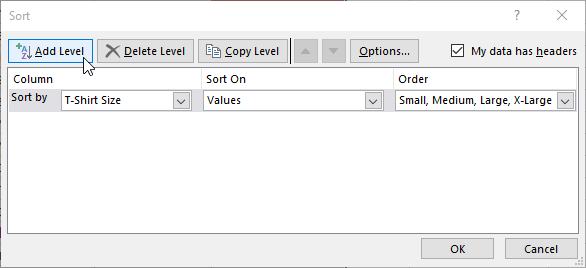
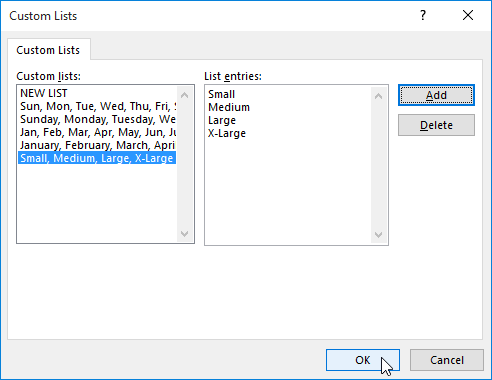
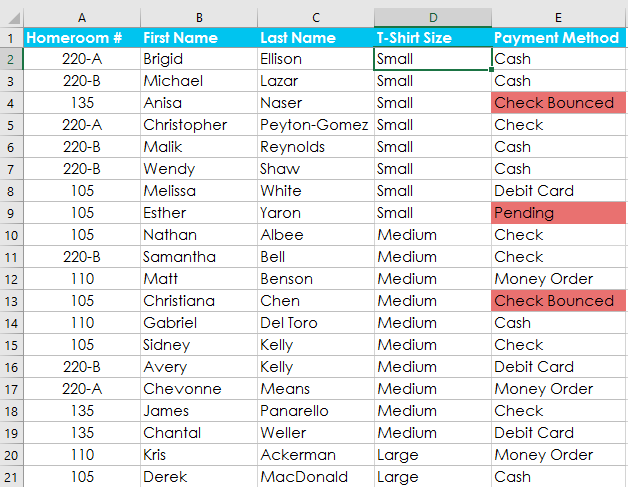
Sorting with Custom Lists
Alphabetical order is not always logical. For example, T-shirt sizes should follow Small, Medium, Large, X-Large — not alphabetical order.
To create a logical order, use Custom Lists.
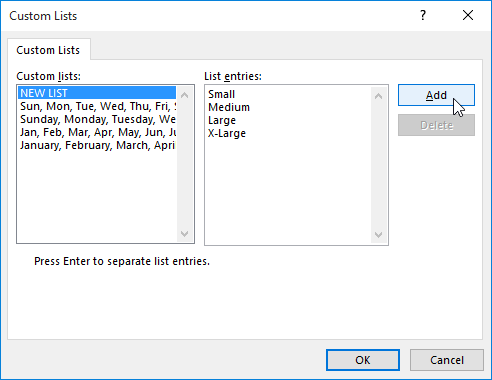
Enter your logical sequence (Small, Medium, Large, X-Large) and click Add.
Knowledge Check
What type of sort would you use to organize a list from A to Z?
Practice File
Download this file and follow along with the lesson.
Challenge
Apply what you've learned in this lesson.
Download and open the practice workbook provided for this lesson.
- Click the Challenge tab at the bottom of the workbook.
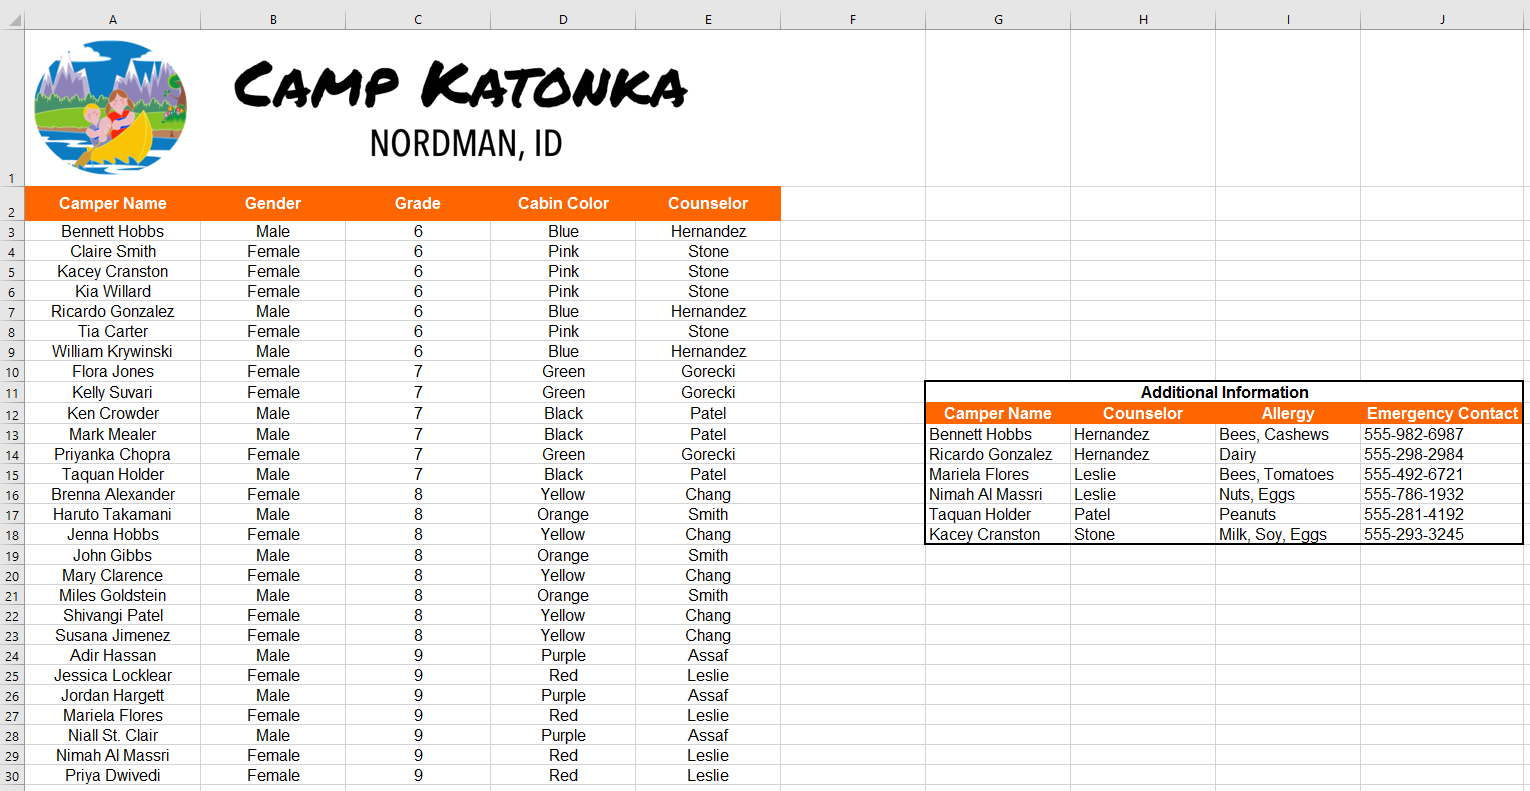
- For the main table, create a custom sort that sorts by Grade from Smallest to Largest and then by Camper Name from A to Z.
- Create a second sort for the Additional Information section. Sort by Counselor (Column H) from A to Z.
- Ensure the entire dataset moves together without misaligning rows.
- When finished, your workbook should match the example shown below.