Freezing Panes and View Options
Learn how to freeze rows and columns, split worksheets, and open multiple windows to compare data more effectively.
By the end of this lesson you can
- Freeze rows and columns so headers stay visible while scrolling
- Split a window to view distant parts of a sheet at once
- Open a second window onto the same workbook
- Choose the right view tool for a given navigation problem
Video
Watch the lesson video, then complete the reading and challenge.
Lesson Notes
Read through the key concepts before you try the challenge.
Losing the headers is a data-entry hazard
You update quantities in a 900-row tracker at Lakeside Medical Associates.
At row 340 the headers are long gone. You are counting columns from the left to work out which is Reorder Level and which is Quantity on Hand. Eventually you miscount, and the entries go into the wrong column.
Your task: Keep the headers on screen, so every row is entered against a visible label.
Freeze Panes keeps chosen rows and columns fixed while the rest scrolls. The rule that catches everyone: Excel freezes everything above and to the left of the selected cell. To freeze row 1 and column A together, select B2 — not A1 — and then Freeze Panes.
| You want | Use | How |
|---|---|---|
| Headers visible while scrolling | Freeze Panes | Select the cell below and right of what should stay, then freeze |
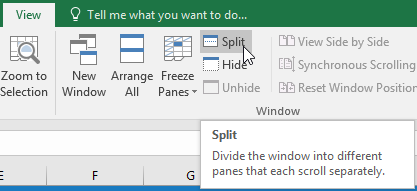
| To compare row 5 with row 400 | Split | View > Split — each pane scrolls independently |
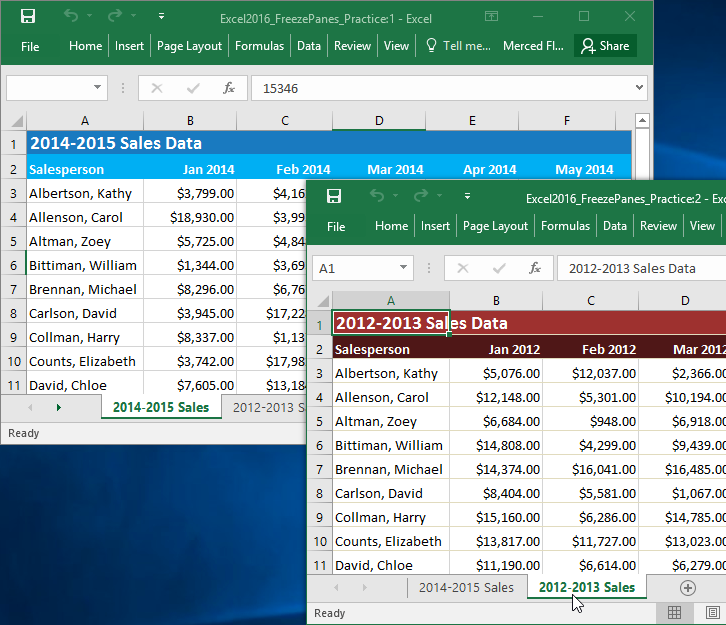
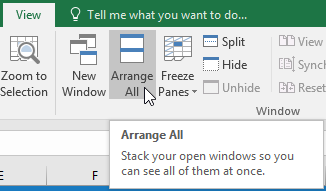
| Two sheets side by side | New Window | View > New Window, then Arrange All |
| To hide detail temporarily | Group | Data > Group creates collapsible sections |
Why Freeze Panes and View Tools Matter
As spreadsheets grow larger, important information like headers and identifiers can disappear when scrolling. Excel provides Freeze Panes, Split, and New Window tools to improve navigation and comparison.
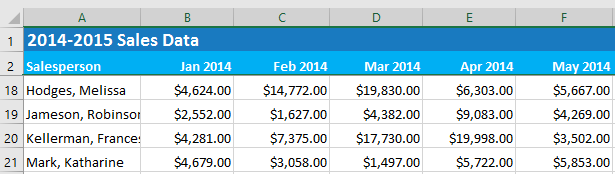
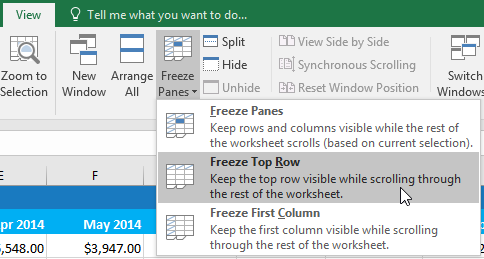
Freeze the Top Row
If your headers are in Row 1, use Freeze Top Row to keep them visible while scrolling.
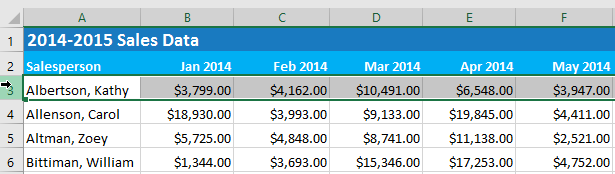
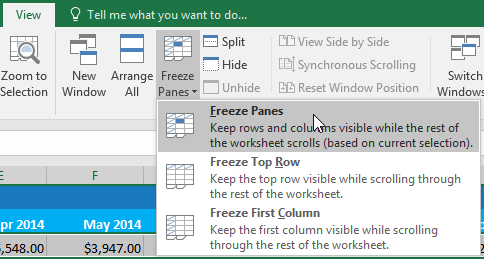
Freeze Multiple Rows
To freeze more than one row, select the row below the rows you want frozen, then choose Freeze Panes.
.png)
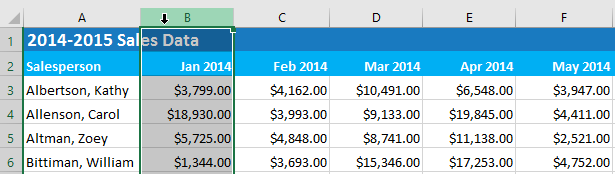
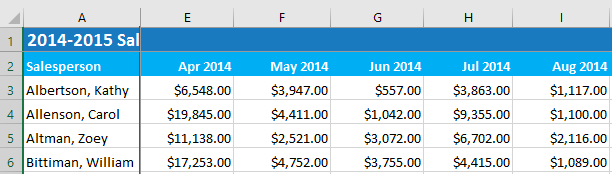
Freeze Columns
To freeze columns, select the column to the right of the columns you want frozen.
Unfreeze Panes
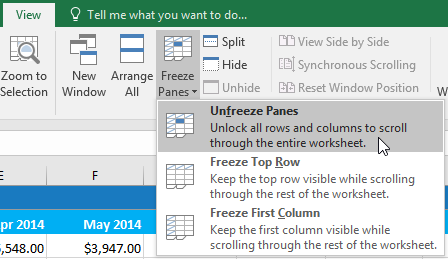
To remove any freeze settings, go to View → Freeze Panes → Unfreeze Panes.
Open a New Window
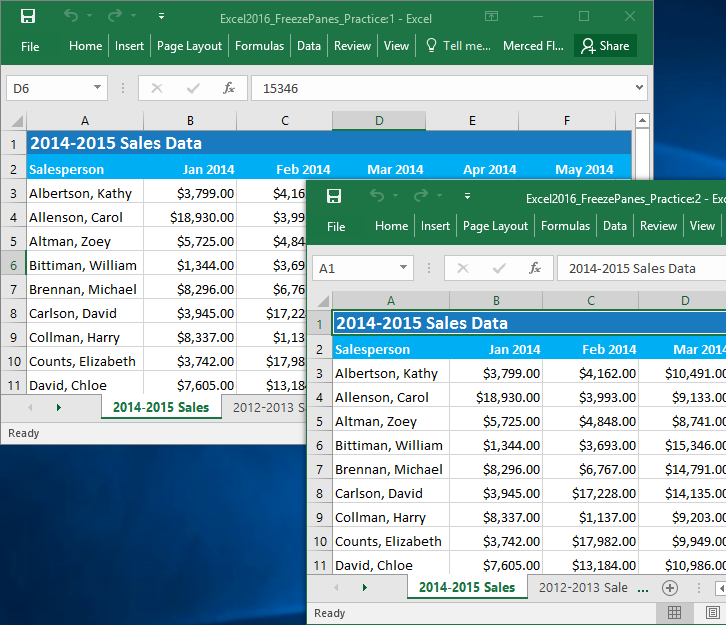
Excel allows you to open a second window of the same workbook for comparison.
Arrange All Windows
Use Arrange All to automatically tile workbook windows for comparison.
Split a Worksheet
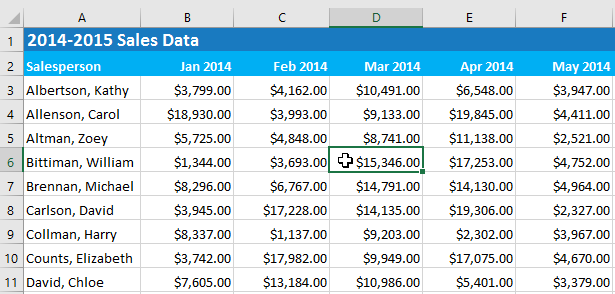
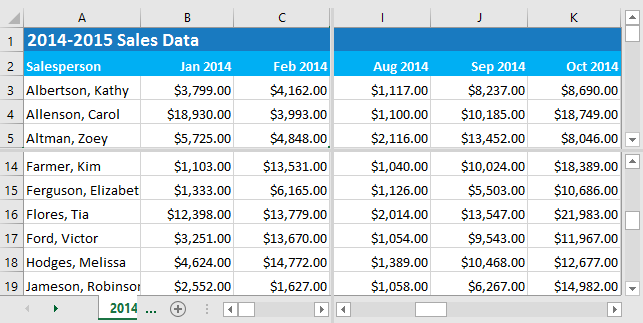
The Split command divides your worksheet into panes that scroll independently.
Knowledge Check
What does freezing the top row in Excel do?
Practice File
Download this file and follow along with the lesson.
Challenge
Apply what you've learned in this lesson.
Within our example file, there is a LOT of sales data. For this challenge, we want to compare data for different years side by side. To do this:
- Download our practice workbook.
- Open a new window for your workbook.
- Freeze First Column and use the horizontal scroll bar to look at sales from 2015.
- Unfreeze the first column.
- Select cell G17 and click Split to split the worksheet into multiple panes. Hint: This should split the worksheet between rows 16 and 17 and columns F and G.
- Use the horizontal scroll bar in the bottom-right of the window to move the worksheet so Column N, which contains data for January 2015, is next to Column F.
- Open a new window for your workbook and select the 2012-2013 Sales tab.
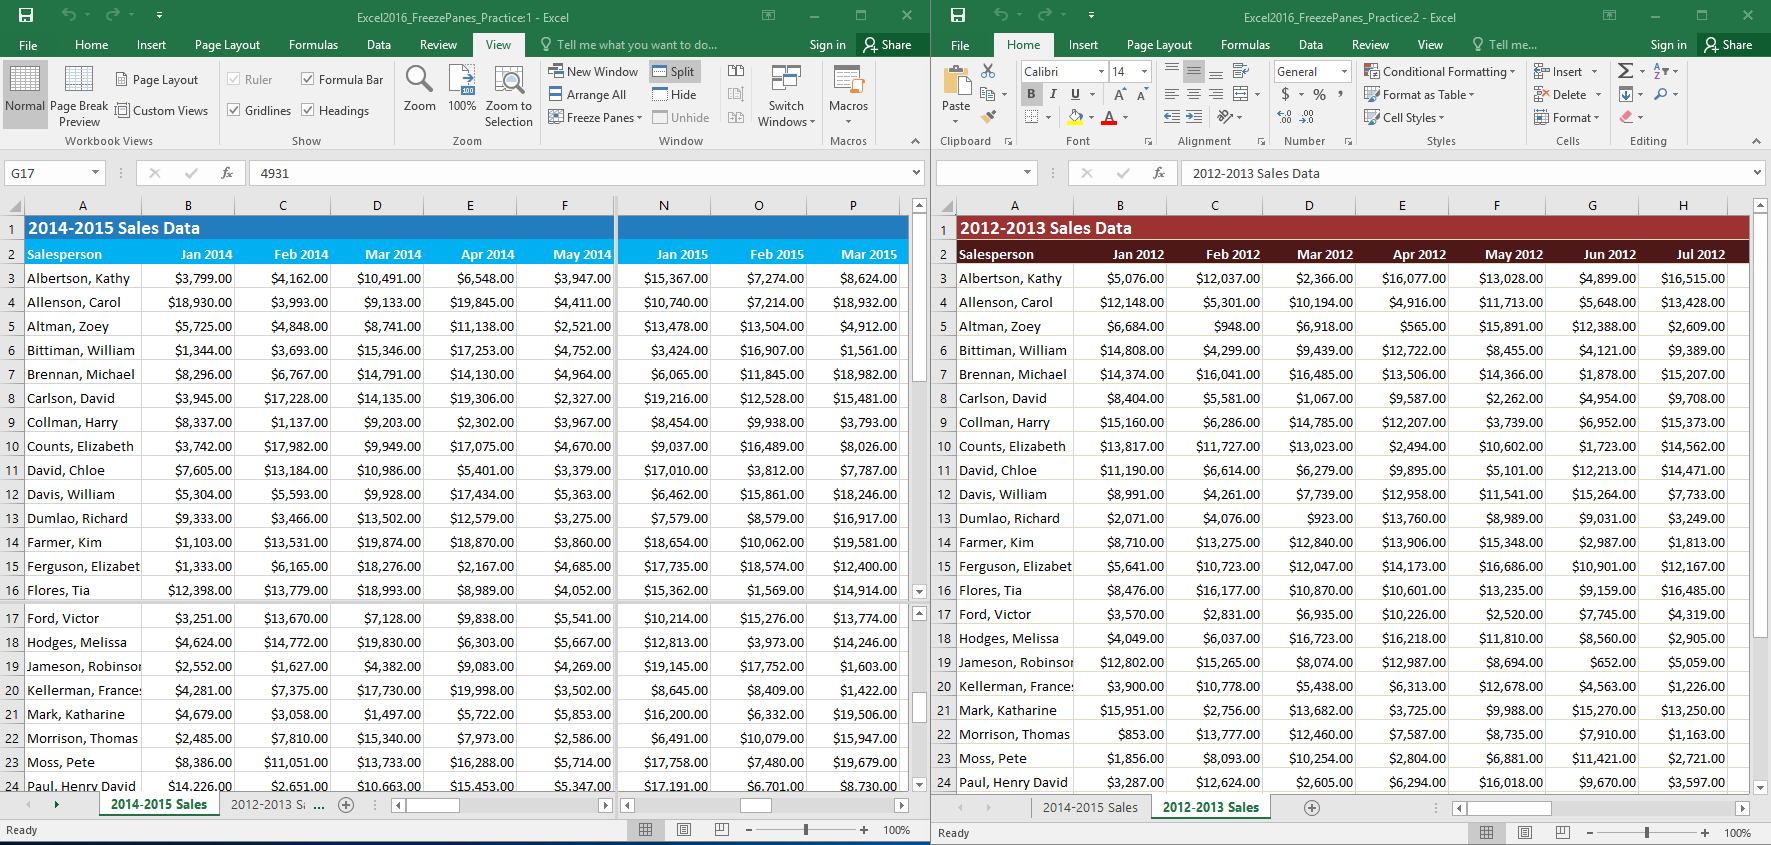
- Move your windows so they are side by side. Now you’re able to compare data for similar months from several different years. Your screen should look something like this:
Finished this lesson?
Progress is saved in this browser only. It is not a grade — official progress lives in Brightspace.