Printing Documents
Learn how to access the Print pane, select a printer, adjust print settings, and print specific pages in Microsoft Word.
By the end of this lesson you can
- Preview a document accurately before committing it to paper
- Print a specific page range, selection, or set of pages
- Choose duplex, collation, and scaling settings appropriately
- Diagnose the common causes of a document that prints differently than it appears
Video
Watch the lesson video, then complete the reading and challenge.
Lesson Notes
Read through the key concepts before you try the challenge.
Print preview is a proofreading tool
You are preparing packets for tomorrow's new-patient orientation at Lakeside Medical Associates.
You send forty copies of a six-page packet to the printer. Two hundred and forty sheets later, you discover a seventh page containing one orphaned line — 'Thank you for choosing Lakeside.' Forty extra sheets, forty stapling errors, and a recycling bin full of paper.
Your task: Use the print pane to catch layout problems before they become physical objects.
The print pane in Backstage view shows the document as the printer will produce it, including margins the screen view can hide. Check the page count first — a document that shows six pages on screen and seven in preview has an orphaned line, a stray page break, or an empty paragraph at the end. Deleting that is thirty seconds of work that saves forty sheets.
| Setting | What it does | When it matters |
|---|---|---|
| Print Range | Prints specific pages, e.g. 1-3, 7 | Reprinting one corrected page instead of the whole packet |
| Print Selection | Prints only the highlighted text | Pulling one section out of a long document |
| Collated | Produces complete sets in order | Any multi-page document you will hand out as packets |
| Print on Both Sides | Duplex printing | Halves the paper for anything over two pages |
| Scale to Paper Size | Fits the layout to the loaded paper | A document laid out for Letter printing on A4, or the reverse |
Opening the Print Pane
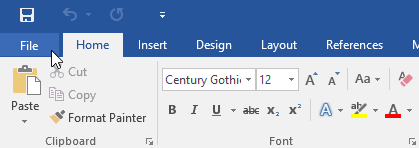
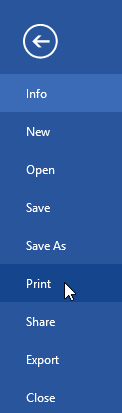
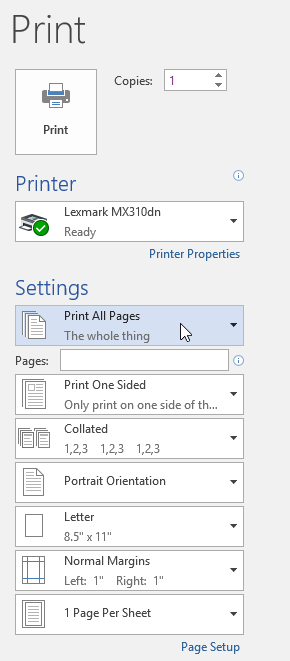
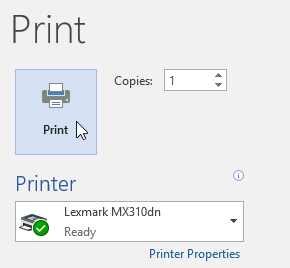
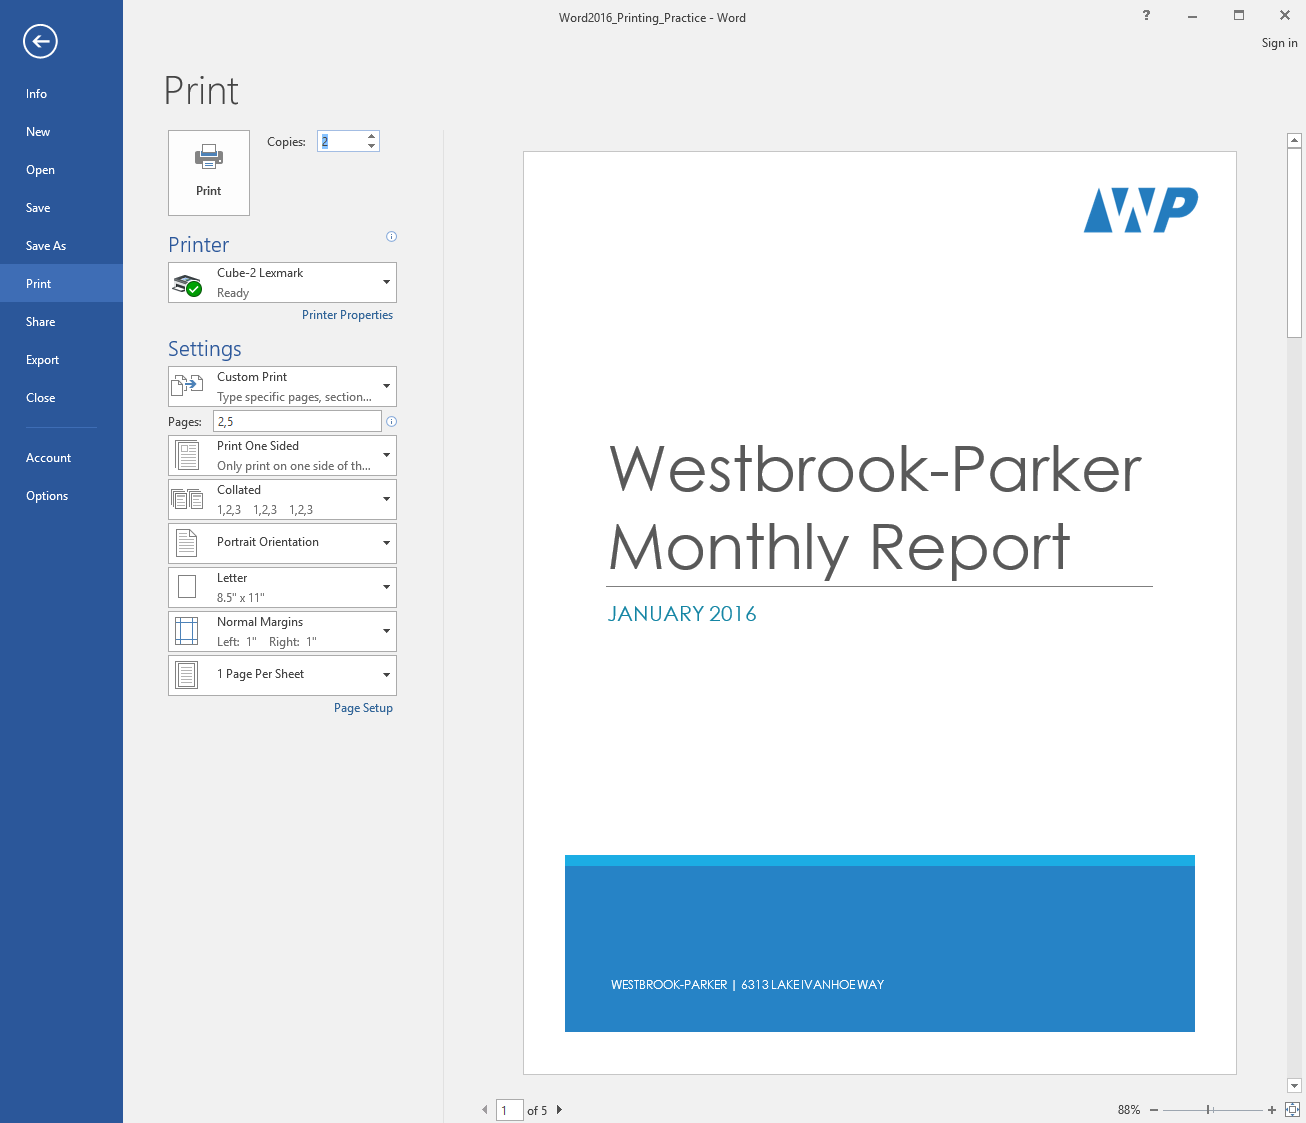
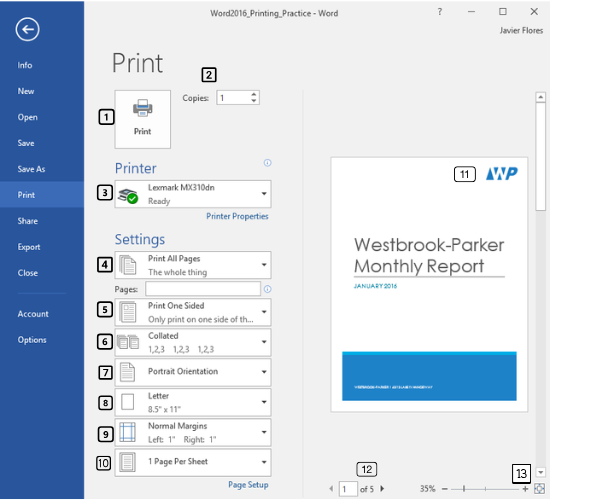
To print a document, click the File tab and then select Print. This opens the Print pane where you can preview and adjust settings before printing.
Selecting a Printer
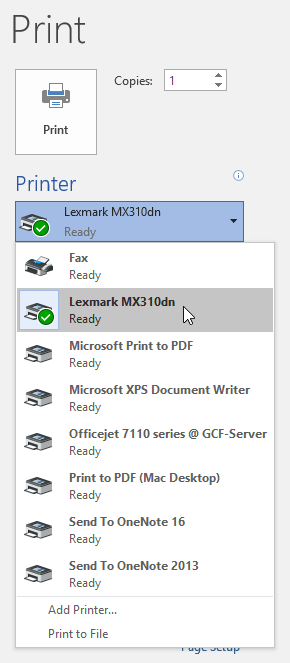
Use the Printer dropdown menu to choose which printer to send your document to. Word displays the printer status (Ready, Offline, etc.).
Choosing the Number of Copies
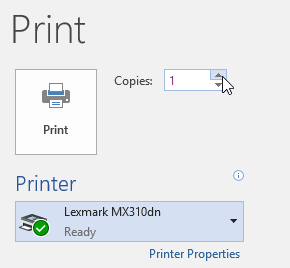
Use the Copies box to specify how many copies of the document you want to print.
Adjusting Print Settings
Under Settings, you can choose to print all pages, specific pages, one-sided or double-sided, portrait or landscape orientation, margins, and more.
Printing Specific Pages
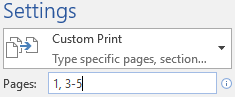
To print specific pages, select Custom Print and enter page numbers separated by commas (e.g., 2,5) or ranges (e.g., 1-3).
Print Preview
The preview pane shows exactly how your document will look when printed. Use the zoom slider to adjust the view before printing.
Final Result
After selecting your printer, adjusting settings, and reviewing the preview, click the Print button to send your document to the printer.
Knowledge Check
Where can you preview how your document will look before printing?
Practice File
Download this file and follow along with the lesson.
Challenge
Apply what you've learned in this lesson.
Using the provided practice file, complete the following tasks:
- Open the Print pane.
- Select your printer from the dropdown list.
- Print 2 copies of the document.
- Print only pages 1–3 and page 5.
- Change the orientation to Landscape.
- Review the print preview before printing.
Finished this lesson?
Progress is saved in this browser only. It is not a grade — official progress lives in Brightspace.