Getting Started with Word
Learn how to navigate the Word interface and understand the Ribbon, Quick Access Toolbar, and Backstage view.
Video
Watch the lesson video, then complete the reading and challenge.
Lesson Notes
Read through the key concepts before you try the challenge.
Introduction
Microsoft Word is a word processing application that allows you to create a variety of documents, including letters, resumes, and more. In this lesson, you'll learn how to navigate the Word interface and become familiar with important features such as the Ribbon, Quick Access Toolbar, and Backstage view.
About This Tutorial
The procedures in this tutorial will work for all recent versions of Microsoft Word, including Word 2019, Word 2016, and Microsoft 365. There may be slight differences, but for the most part these versions are very similar.
The Word Interface
When you open Word for the first time, the Start Screen appears. From here, you can create a new document, choose a template, or access recently edited documents. Select Blank Document to access the Word interface.
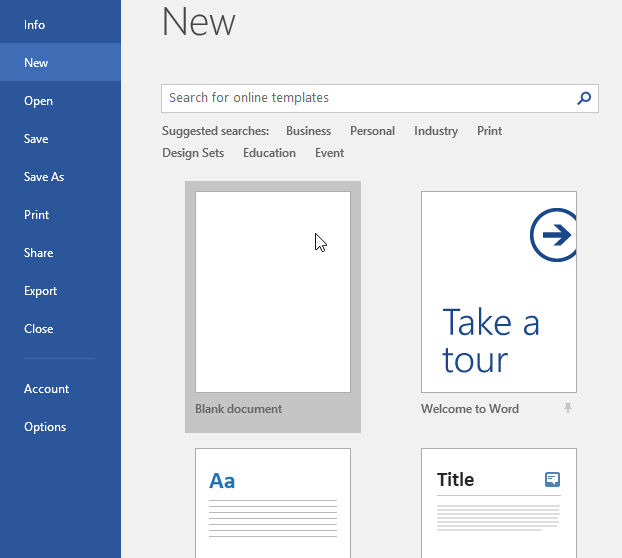
Select Blank Document from the Start Screen.
Working with the Word Environment
All recent versions of Word include the Ribbon and the Quick Access Toolbar, where you'll find commands to perform common tasks in Word, as well as Backstage view.
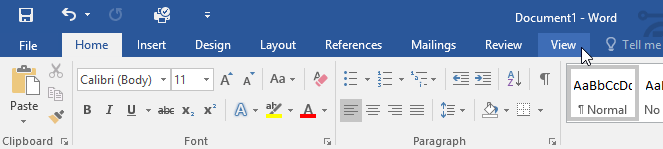
The Ribbon
Word uses a tabbed Ribbon system instead of traditional menus. The Ribbon contains multiple tabs near the top of the Word window. Each tab contains groups of related commands.
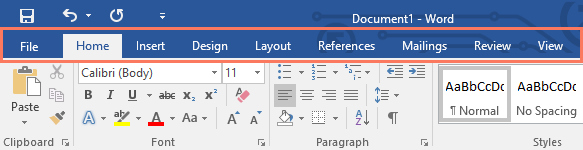
The Ribbon contains multiple tabs and command groups.
Some groups have a small arrow in the bottom-right corner that opens additional options.
Click the small arrow for additional formatting options.
Showing and Hiding the Ribbon
If the Ribbon takes up too much space, you can hide it. Click the Ribbon Display Options button in the upper-right corner of the window.
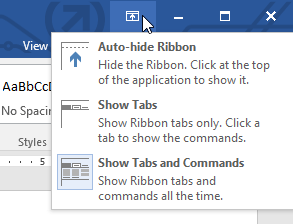
- Auto-hide Ribbon – Completely hides the Ribbon.
- Show Tabs – Shows only the tab names.
- Show Tabs and Commands – Shows the full Ribbon (default).
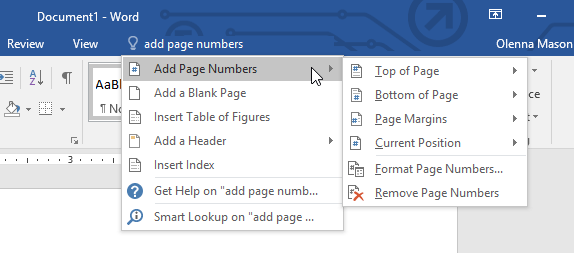
Using the Tell Me Feature
If you're having trouble finding a command, use the Tell Me feature. Type what you're looking for in the Tell Me bar and select a result from the dropdown.
The Quick Access Toolbar
Located above the Ribbon, the Quick Access Toolbar provides quick access to Save, Undo, and Redo. You can customize it with additional commands.
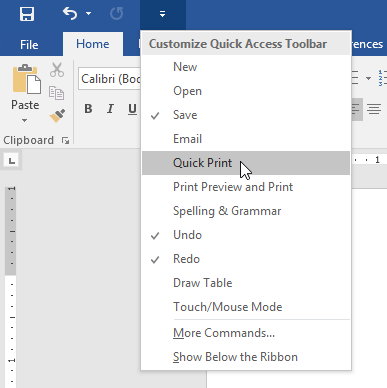
- Click the drop-down arrow next to the Quick Access Toolbar.
- Select the command you want to add.
- The command will appear on the toolbar.
The Ruler
The Ruler appears at the top and left of the document and helps you adjust margins and alignment precisely.
To show or hide the Ruler, click the View tab and check or uncheck the Ruler box.
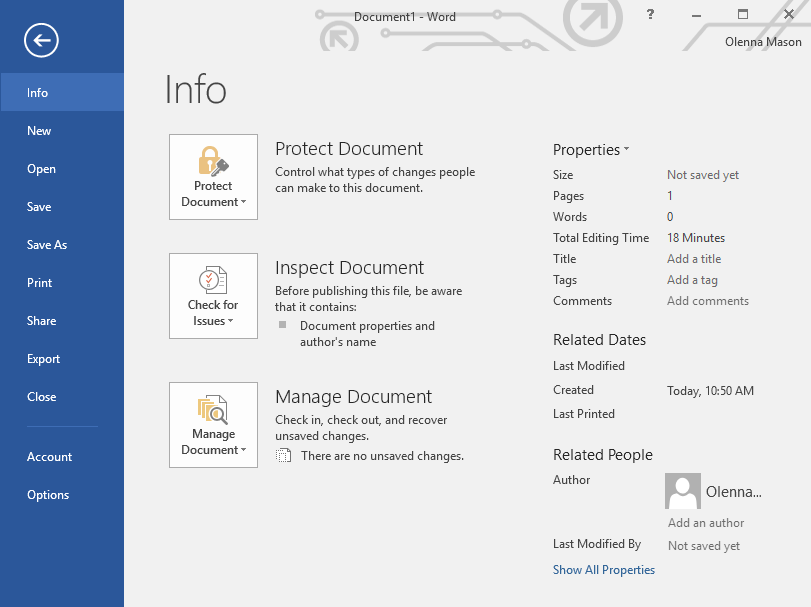
Backstage View
Backstage view provides options for saving, printing, sharing, and managing documents. Click the File tab to open Backstage view.
Document Views and Zooming
Word offers several document views: Read Mode, Print Layout, and Web Layout. These views change how your document appears.

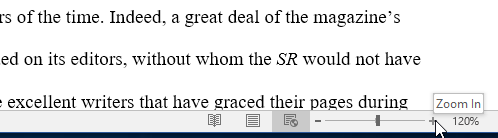
You can zoom in or out using the zoom slider in the bottom-right corner of the window.
Knowledge Check
Where are most Word formatting commands found?
Challenge
Apply what you've learned in this lesson.
- Open Word and create a blank document.
- Change Ribbon Display Options to Show Tabs.
- Using Customize Quick Access Toolbar, add New, Quick Print, and Spelling & Grammar.
- In the Tell Me bar, type Shape and press Enter.
- Choose a shape and double-click somewhere in the document.
- Show the Ruler if it is not already visible.
- Zoom the document to 120%.
- Change the Document view to Web Layout.
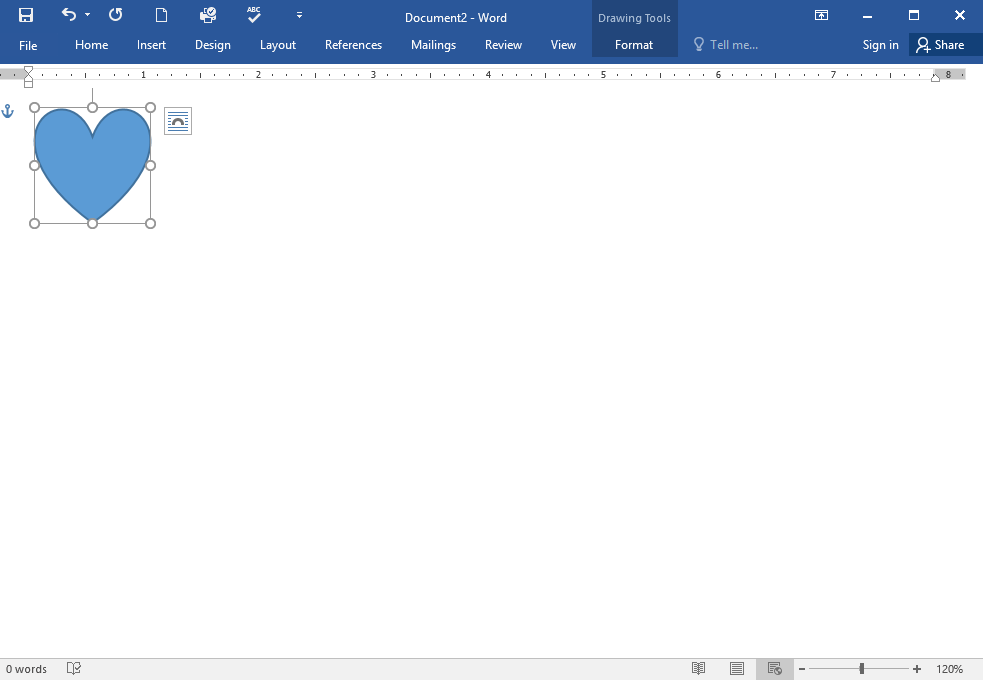
- When finished, your document should look something like this.
- Change Ribbon Display Options back to Show Tabs and Commands, and change view back to Print Layout.