Inspecting and Protecting Workbooks
Learn how to inspect your workbook for hidden information and protect it before sharing by using Document Inspector and Protect Workbook tools.
By the end of this lesson you can
- Use Document Inspector to find hidden and personal data
- Protect a worksheet so formulas cannot be overwritten
- Explain the difference between protecting a sheet and protecting a workbook
- Understand the limits of Excel's password protection
Video
Watch the lesson video, then complete the reading and challenge.
Lesson Notes
Read through the key concepts before you try the challenge.
Protect the formulas, not the people
You built the supply tracker three staff members use daily at Lakeside Medical Associates.
Within a fortnight, two formula cells have been overwritten with typed numbers. Nobody did it deliberately — they tabbed into the wrong cell and typed. The tracker now reports figures that are simply wrong, and nothing on screen indicates it.
Your task: Lock the calculated cells and leave the data entry cells open, so the tool survives daily use.
Sheet protection works in two stages, and the order surprises people. Every cell is marked Locked by default, but locking has no effect until the sheet is protected. So you first unlock the cells people should edit, then protect the sheet — which activates the lock on everything you did not unlock.
Protecting a shared tracker
Let three staff enter quantities and prices while making the formula columns impossible to overwrite by accident.
- 1
Select the data entry cells, then Format Cells > Protection and uncheck Locked.
This is the step that feels backwards. You are unlocking the cells you want editable, because protection will lock everything else. Skipping straight to Protect Sheet locks the entire sheet and nobody can enter anything.
- 2
Give the unlocked cells a distinct fill color.
People should be able to see where they may type before they try. A consistent color for input cells prevents most of the confused clicking that protection would otherwise produce.
- 3
Review > Protect Sheet, and leave 'Select unlocked cells' checked.
This activates the locks. Leaving selection of unlocked cells enabled means staff can still tab through the sheet normally — protection should stop mistakes without making the tool awkward.
- 4
Set a password only if you will still have it in a year, and record it somewhere durable.
Sheet protection is designed to prevent accidents, not to resist attack — the passwords are trivially removable with freely available tools. Its real value is stopping honest mistakes, and a lost password locks you out of your own workbook for no security benefit.
Result: A tracker three people use daily where the formulas cannot be overwritten by a stray keystroke.
Unlock first, then protect. And treat Excel protection as accident prevention rather than security.
Why Inspect and Protect a Workbook?
Before sharing a workbook, you should remove hidden personal information and discourage unwanted editing. Excel provides tools such as Document Inspector and Protect Workbook to help finalize your file.
Using Document Inspector
Click the File tab to open Backstage view. From the Info pane, select Check for Issues and then click Inspect Document.
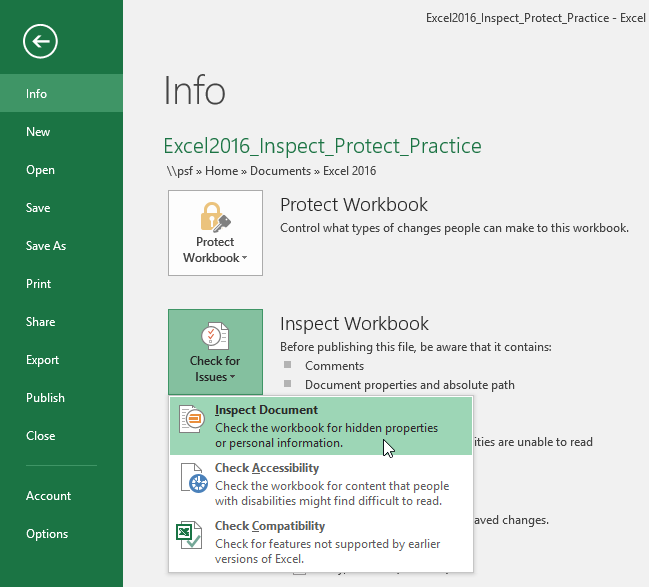
Excel may prompt you to save your file before continuing. Click Yes to proceed.

Leave all inspection options selected and click Inspect.
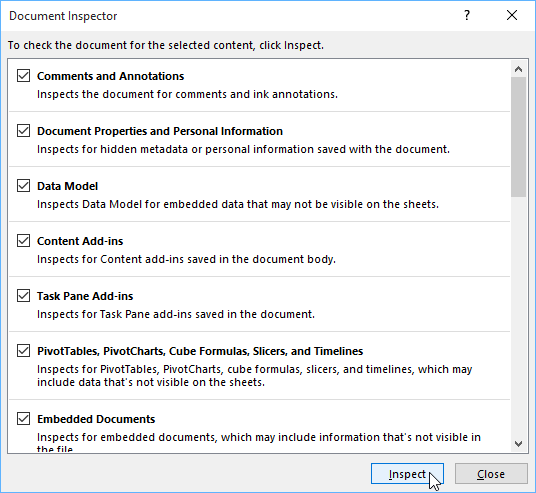
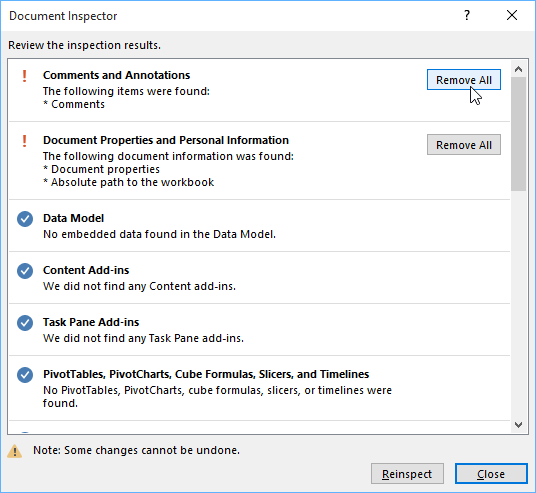
Removing Hidden Information
If the inspector finds comments or personal information, click Remove All next to each category.
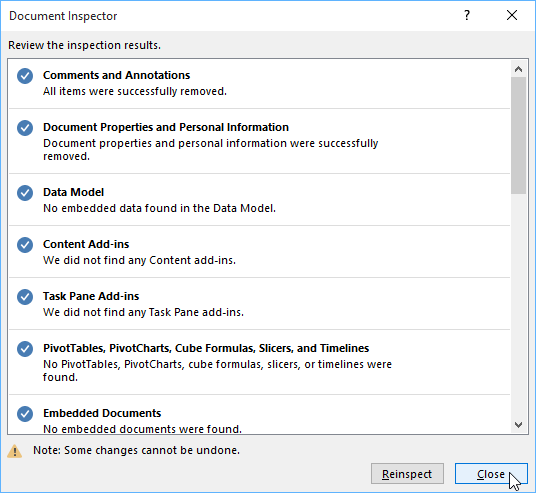
When finished, click Close to return to your workbook.
Protecting the Workbook
To discourage editing, go to File → Info → Protect Workbook and choose Mark as Final.
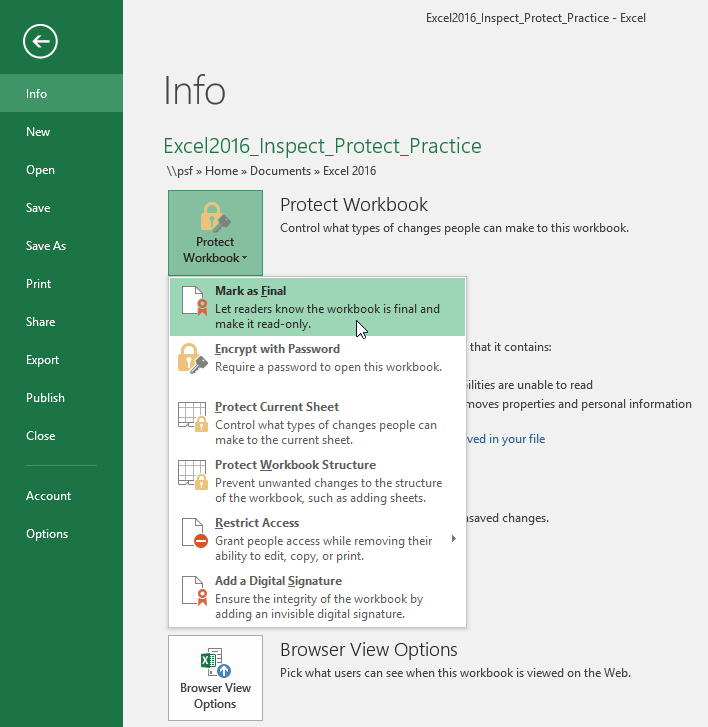
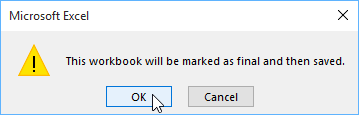
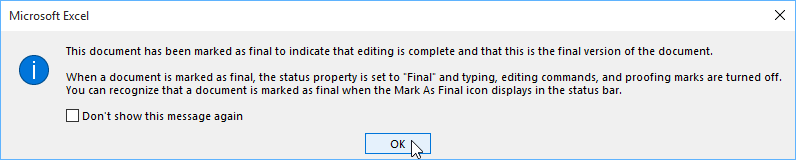
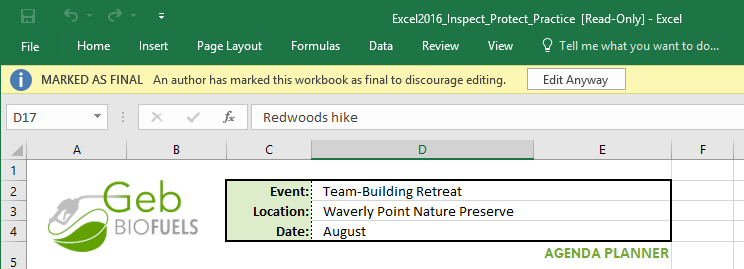
When a workbook is marked as final, a banner appears indicating that editing is discouraged.
Knowledge Check
What does Document Inspector help you do?
Practice File
Download this file and follow along with the lesson.
Challenge
Apply what you've learned in this lesson.
Complete the following tasks:
- Open the Inspect and Protect practice workbook.
- Run Document Inspector and remove any comments or personal information found.
- Close the inspector after removing issues.
- Protect the workbook by selecting Mark as Final.
- Verify that the 'Marked as Final' banner appears.
Finished this lesson?
Progress is saved in this browser only. It is not a grade — official progress lives in Brightspace.